video game Design
Updated 9/6/22
Click on program name for information and instructions.

First time? Here's how to get started!
Ask your instructor for help if you need it.
- Click the picture to the left to open Bloxels Builder in a new window.
- Click Log In in the upper left corner.
- Under Students, enter the class code for your school. This will be the first 4 letters of your school’s name and the number 21 (ex. WHIT21, KILM21). Press Next.
- Find and select your avatar/username. In most cases, this will be your initials (first, last) and the name of your school. Press Next.
- The first time you log in, you will create your password, which is a 4-digit number. Pick something easy for you to remember, but hard for others to guess. Press Login.
- Now that you’re logged in, press Play to head to the Arcade. You can play some of the Featured Games other designers have made with Bloxels.
- When you’re ready to get started on your game design journey with Bloxels, scroll down to the What Should I Do section on this page to find out where to go next.
Have fun!

First time? Here's how to get started!
Note: You must create and log in with a Microsoft account to save your work.
Ask your instructor for help if you need it.
You will still be able to use Makecode Arcade without creating an account. Your work should be saved in your web browser, but not in the cloud. As long as you use the same web browser on the same computer, you should see your progress and saved projects.
Account Creation Instructions
- Click the Sign In button in the upper right corner.
- Leave the Remember Me toggle turned off, then press the Sign In button again to continue.
- If you happen to have a Microsoft account and you know your credentials, you may use them to sign in at this time. Otherwise, you should click No account? Create one!
- On the next screen, you will need to enter an email address to use with your account. This can be your Google email or any other that you have access to check. Then press Next.
- Now, you will create your password. Choose something secure and memorable to you. Then press Next.
- On the next screen, your country can remain United States and then enter your real birth date to confirm your age. Then press Next.
- At this time, Microsoft will send you an email with a code you must enter to confirm your account. Check the email you used and then enter the code. You may need to look in your Spam or Promotions folder. You can uncheck the box if you don’t want to receive info email from Microsoft. Then press Next.
- You will need to solve puzzle to confirm you aren’t a robot.
- Since you are most likely under 13 years old, your account will need parent/guardian consent. Click the button that says “I’m not a parent or guardian. I need to ask a parent or guardian for help.” Then press Continue.
- We will need to have Microsoft email your parent to give consent. Select the “You can email them for help” option. If you do not know a parent’s email address, ask your facilitator for assistance. Once you enter their email address, press Send Email.
- You will not be able to continue using your Microsoft account until your parent or guardian uses the email they are sent to give you consent. In the meantime, you can return to MakeCode Arcade to begin working on the Beginner Skillmap. Any progress should be saved in your browser.
Click the MakeCode Arcade title at the top of this section to visit the MakeCode Arcade page with more information, ideas, and instructions on what to do next. Have fun!
Have fun!
CS First - Click this picture to get started:

Scratch - Click this picture to get started:

First time? Here's how to get started!
Ask your instructor for help if you need it.
- Click the top picture to the left to begin your registration for CS First.
- Select the option to Sign in with CS First. Select this option even if you have a Google account you could use.
- You will need to enter the class code to join the Create and Code class. The class code is 8dp9b4. Press the Next button.
- Double check that you see the Welcome to TechBrainiacs Create and Code! message. If you already have a CS First username and password, you may enter it here to login.
- If you need a username and password, press the link to Create an account at the bottom of the login box.
- Check the box that you understand that you should only be creating a new account after discussing it with your instructor.
- You will be automatically assigned a username and password. Do not go any further until you have recorded this username and password. If you are participating in person, ask for a Student Login sheet from your instructor if you haven’t already been given one. Use the form below to submit your login details electronically.
- Click the check box that says “Yes, I wrote my username and password down”, and then press the Sign In button. You may check the “Keep me signed in to CS First on this device” box if you are using your own (non-school) computer.
- The next screen will be the My Classes dashboard, where you will select the activity theme and/or activity you will begin. Select Game Design.
- You will first be given a survey. To skip the survey and go directly to your first project, click Lessons & Badges along the top menu bar. Select Activity #1, video #2: What is Computer Science. Watch this video for an introduction to how you will use CS First and Scratch to complete awesome projects.
- Continue to follow the directions and watch the next videos to get started on your first project.
Click the Scratch Game Design title at the top of this section to visit the Scratch Game Design page with more information, ideas, and instructions on what to do next. Have fun!
Game Design Resources


First time? Here's how to get started!
Note: Access to Gamestar Mechanic has changed. Flash Player no longer works and you will need to download and install a new standalone version of Gamestar Mechanic in order to continue using it. Once installed on your computer, you will be able to create an account and log in according to the directions below.
Ask your instructor for help if you need it.
Download & Install Instructions
- Click the top picture to the left and download Gamestar Mechanic for your type of computer, Windows or Mac. This version of Gamestar will not work on Chromebooks.
- Extract the Gamestar Mechanic setup file from the file you downloaded.
- Run the Gamestar Mechanic setup file. Follow the directions to complete the installation.
- Open the Gamestar Mechanic program that has now been installed. Log in using your existing username and password or follow the instructions below to create a new account.
Account Creation Instructions
- From the main Gamestar Mechanic page, press the Get Started button.
- Your username should be an animal followed by a 4-digit number (ex. cobra7531, tiger8935). Password should be the reverse, number then animal (ex. 7531cobra, 8935tiger). Confirm password means enter same password again. Enter your birthday, check the “I have read and agree…” box, and press Register.
- Answer the security questions once, then press the orange button. Answer them again with the same answers on the next page and then press the orange button again.
- Your account has now been created! Do not go any further until you have recorded your username and password. If you are participating in person, ask for a Student Login sheet from your instructor if you haven’t already been given one. Use the form below to submit your login details electronically.
- Use the button on the right hand side of the main menu or at the top of the screen to go to the Game Alley and choose a game to play while you wait for further instructions.
Click the Gamestar Mechanic title at the top of this section to visit the Gamestar Mechanic page with more information, ideas, and instructions on what to do next. Have fun!


First time? Here's how to get started!
Ask your instructor for help if you need it.
- Click the top picture to the left to begin your registration.
- Your username should be an animal followed by a 4-digit number (ex. cobra7531, tiger8935). Password should be the reverse, number then animal (ex. 7531cobra, 8935tiger). Confirm password means enter same password again. Password must be at least 8 characters long.
- For email address, enter yourfirstname@tb.com (ex. jeremy@tb.com, jenny@tb.com). Confirm email address means enter same email again.
- Uncheck “Allow comments and friending on my profile” and check “I agree to abide by the terms of service…”. Finally, check “I’m not a robot” and press Register.
- Before continuing, be sure to write down your username and password on your Student Login sheet.
- Once that’s done, you may Edit your Avatar.
- When you are finished with your avatar and are ready to get started making games, click on the Sploder! logo to return to the home page and select Make a Game. Get started with the Retro Arcade Game Creator, but you will the chance to explore the other game types later. Have fun!
Click the Sploder title at the top of this section to visit the Sploder page with more information, ideas, and instructions on what to do next. Have fun!
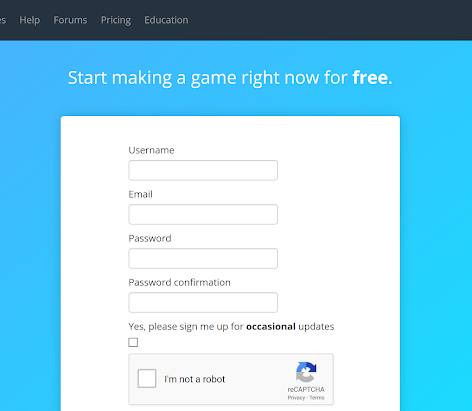

First time? Here's how to get started!
Ask your instructor for help if you need it.
- Your username should be an animal followed by a 4-digit number (ex. cobra7531, tiger8935). Password should be the reverse, number then animal (ex. 7531cobra, 8935tiger). Password confirmation means enter same password again. Password must be at least 8 characters long.
- For email address, enter yourfirstname@tb.com (ex. jeremy@tb.com, jenny@tb.com). Confirm email address means enter same email again. Note: You may also use your school Google email address.
- Leave “Yes, please sign me up for occasional updates” unchecked. Put a check in the “I am not a robot” box. Then press Sign Up.
- Before continuing, be sure to write down your username and password on your Student Login sheet. You must also record your login information electronically using the link at the top of this page (“Click here to record your login information”).
- Follow the directions and click on the +New Game button. Make sure the Flowlab Tutorial project is selected and press OK.
- Follow the directions to complete the tutorial and build your first Flowlab game. Have fun!
Click the Flowlab title at the top of this section to visit the Flowlab page with more information, ideas, and instructions on what to do next. Have fun!

First time? Here's how to get started!
Ask your instructor to help you create your account.
- Click the picture to the left to begin your registration or login.
- On the Gamestar Mechanic Jr. homepage, click New Player.
- On the next screen, click “I don’t have a username”.
- Your username should be an animal followed by a 4-digit number (ex. cobra7531, tiger8935). Enter it in the box and press OK.
- On the next screen, do not use the suggested password. Instead, your password should be the reverse of your username, number then animal (ex. 7531cobra, 8935tiger). You will need to enter the same password twice in the two boxes, then press OK.
- On the next screen, select your favorite animal, favorite food, and favorite color of the choices listed. After making your choices, press OK.
- Before moving on to begin, be sure to write down your username and password on the Student Login sheet your instructor will provide. Click Done once you are sure your login has been recorded.
- The next screen will be your Gamestar Mechanic Jr. dashboard. Click Play Quests to get started with your first mission. Be sure to listen and pay attention to all your fellow game designers in Gamestar Jr. have to tell you about making games. Have fun!